This was my first loaf of no knead bread in at least a few months. I’ve been busy testing recipes for the new book and trying to keep up with some other work so store-bought bread has made a huge comeback in our kitchen.
I was excited that you guys voted for it though because I knew I needed a reminder of why I love it so much.
This Oat No Knead Bread recipe is only slightly adapted from my basic no knead bread recipe that I used to make about once a week. The one new addition does add some nice texture to the loaf, but in reality this is just a reminder that bread can be easy to make at home.
If I can do one thing as a food blogger, I hope it is to convince bread lovers to try this method.
Oat No Knead Bread
Equipment
Ingredients
- 3 cups bread flour
- ½ cup steel-cut oats
- 1 teaspoon salt
- ¼ teaspoon active dry yeast
- 2 ⅓ cups lukewarm water
- Extra flour, for shaping
- Ground flaxseed, for shaping (optional)
Instructions
- Stir together flour, oats, salt, and yeast in a large bowl.
- Add in water and stir to combine. The dough should be very wet. Much too wet to work with.
- Cover dough and let it rise at room temperature for 12-16 hours.
- After rise, turn dough out onto a heavily floured surface and fold the dough over itself a few times, using lots of flour, until the dough holds its shape in a ball. You might need a cup or two of flour to get it to hold its shape.
- Line a clean dish towel with flour and flaxseed if you’re using it. Transfer dough ball to the towel with the seam of the dough facing down toward the towel. Cover loosely and let rise a second time for 30 minutes.
- Preheat oven to 500 degrees Fahrenheit for 30 minutes with the bottom part of a large cast iron dutch oven in the oven so it gets very hot. Don’t preheat the lid.
- After 30 minutes pull out pan and carefully roll dough ball into pan so now the seam is facing UP. Cover pot and bake at 500 degrees for 30 minutes.
- Remove lid carefully after 30 minutes (steam will rush out so be careful) and return to oven uncovered for 18-20 minutes until dough is nicely browned.
- Carefully remove bread from pan and let cool for 30 minutes before slicing.
- Let bread cool completely before storing in bags. You can store on the counter for a day or two if you are going to use it immediately or store in the fridge for 7-10 days.
Nutrition
Did you make this recipe?
Oat No Knead Bread
The Dough
Before I started making this method of bread, I thought it of bread baking as something that dedicated bakers do at 3AM. So much kneading and rising. Who has all that time?
But this method is so simple and requires maybe fifteen minutes of active time (maybe). Plus it requires just a few simple ingredients. If you try this though, do try to find bread flour as it makes a big difference in the final texture.
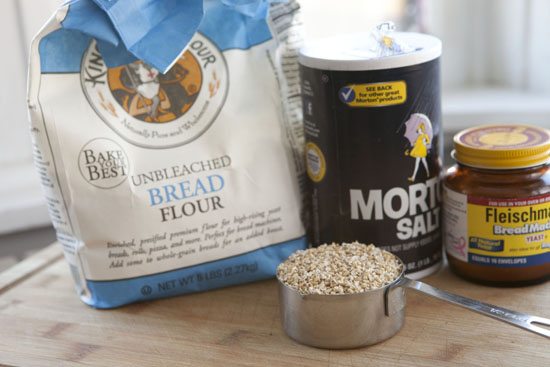
Toss together the dry ingredients in a large bowl.
I was a bit hesitant about using steel cut oats as they are very thick and I wasn’t sure that they would soften, but the long rise time gets the job done.
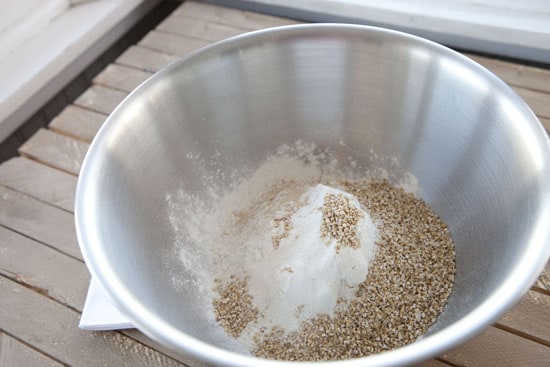
Stir the dry ingredients together and then add in the water.
If you are a regular no knead dough maker, you’ll need a bit more water than normal for this version because the oats will really suck up some water.
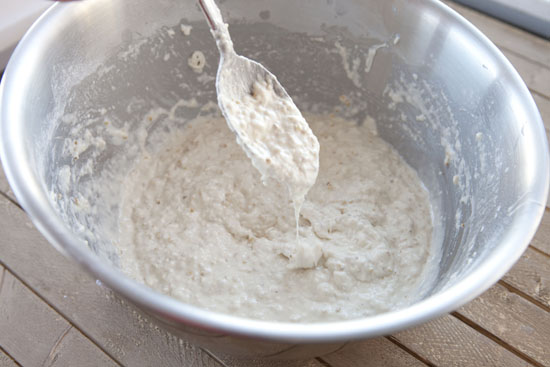
After you add the water, the dough should almost be soupy. This will be bread later. I promise.
The Rise
Once you’ve made your flour soup, just cover it and stick it on the counter for 12-16 hours. I usually make my dough in the afternoon on Saturday and then bake my loaf Sunday morning.
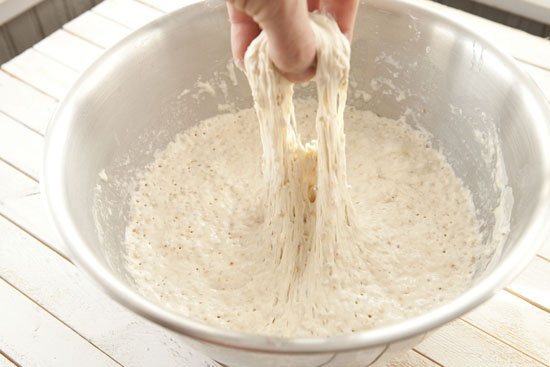
After a night of rising, the dough will still be very wet, but it’ll have a lot more texture to it. You’ll be able to stretch it a bit like this.
Making the Loaf
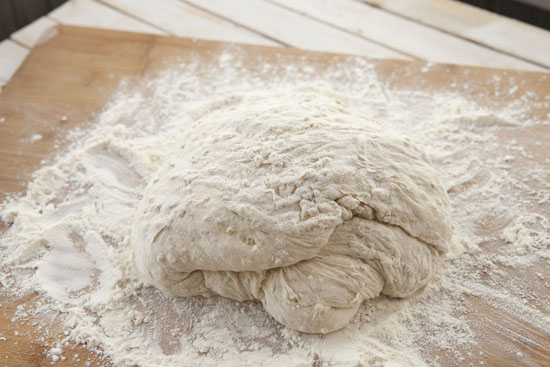
The tricky part is getting this very wet dough into a ball that you can bake. The only tip I can give is use lots of flour!
I throw down at least a cup of flour on a clean surface and then scoop out the dough. Start folding the dough over itself so it’s nicely coated with flour. Keep doing this until the dough holds its shape.
After five or six folds, my dough started to hold its shape nicely so I knew I was ready to go.
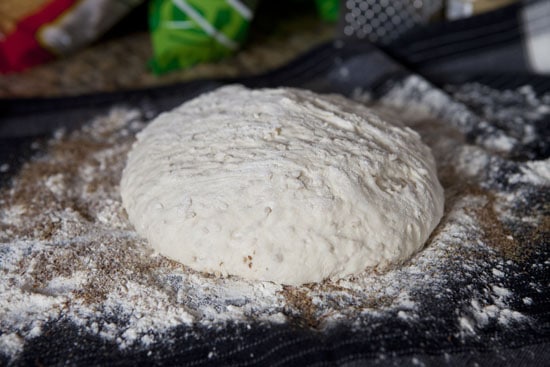
Grab a clean dish towel and cover it liberally with flour and ground flaxseed if you’re using that. I like the texture that the flax gives, but it’s not necessary.
Carefully place your dough ball on this towel with the seam side down. By seam, I mean the crease that you’ll create as you fold the dough over itself. So the top of the dough on the towel should look nice and even.
The Heat
Cover the dough loosely at this point and let it rise for another thirty minutes.
Meanwhile, preheat your oven to a blazing hot 500 degrees Fahrenheit. Also, as the oven preheats, stick your cast iron pot in the oven so it gets as hot as possible.
Almost any large dutch oven will work for this. You just need something large enough to hold the dough and also cast iron so it can handle the heat. Don’t preheat the lid along with the pot as sometimes lids have handles that can’t get super hot for very long.
After thirty minutes of pre-heating, remove the pot and carefully roll your dough ball out of the towel and into the pot. Now the seam on the dough is facing up! This allows steam to escape as it bakes.
A NOTE ON KNOBS: Many cast iron dutch oven weirdly come with knobs on the lids that are hard plastic. Most of these are temperature rated to only 400 degrees. While rare, I’ve heard of some people that have had their knobs melt if they are exposed to high heat. This is an easy fix! They make stainless steel replacement knobs for the lids or you can go to a hardware store and by a metal knob for a few bucks.
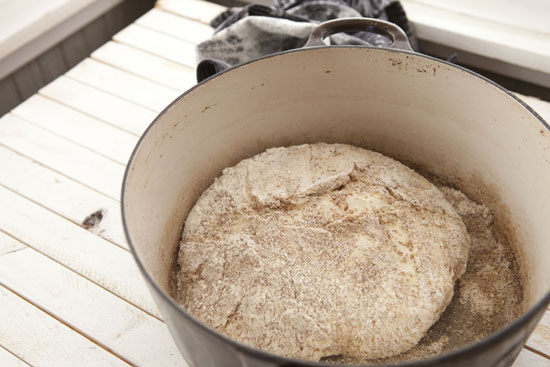
Cover the pot with a heavy lid and bake it at 500 degrees for 30 minutes.
Baking the dough in the dutch oven like this creates a mini-oven of sorts that’s very hot and has a high humidity which is exactly what you want.
After thirty minutes, carefully remove the lid. And seriously folks, be careful. When you pull that lid off lots of hot steam will rush out and it can really burn you.
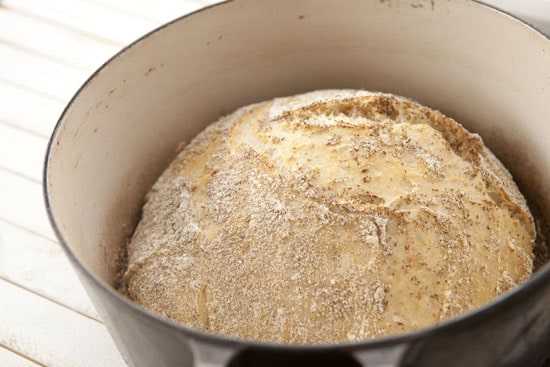
Now add the pot back to the oven without the lid which will brown the bread nicely. Bake it for another 18-20 minutes uncovered.
Then carefully remove the loaf from the pan and let it cool for about 30 minutes before slicing it.
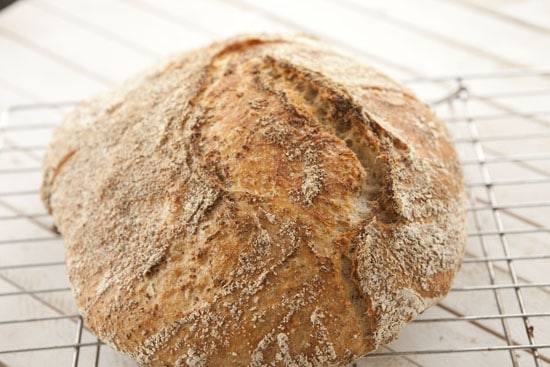
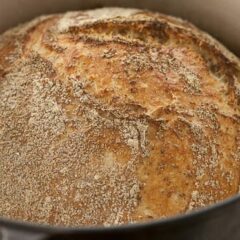
This bread had a fantastic crust and crumb. Check that out.
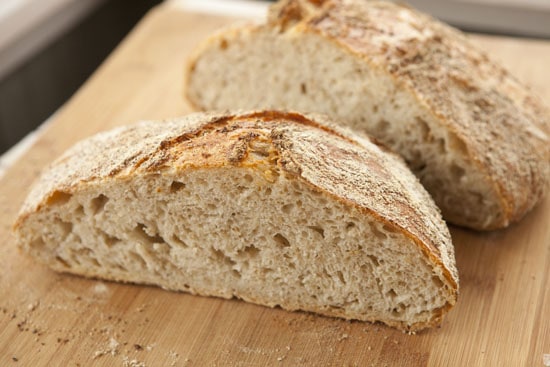
Betsy and I have devoured this loaf of bread this week. I sort of forgot how much better it is than store-bought loaves.We have used it for sandwiches and some great garlic bread also.

Kelly
I’ve always been too intimidated by the process to start making my own bread, but this seems so easy and looks so delicious, you just inspired me to finally give it a whirl!
Nick
Totally try it! It’s very worth it if you’re a bread fan. Good luck!
Tim H
The Lodge Color is only rated to go up to 400 degrees. Do you use it in a 500 degree oven?
Nick
Hey Tim, I personally have not, but have heard from others that it works. The pot is cast iron and should have no problem withstanding the heat. The lid is what has the heat limitations, specifically the knob on the lid. The lid should be fine as well as long as you don’t preheat it. There’s actually a replacement knob that you can buy for the lid that will make it 100% fine:
Lodge Replacement Knob
The pot I use is a Le Creuset that has the same warnings on the lid and I’ve used it without issue for 3-4 years now.
All of that said… if you try it, you do so at your own risk, but I’ve never heard of any issues just from 30 minutes of heat which is all the lid needs to be in for this recipe.
If you’re very concerned, just spend the $7 on the replacement knob or you could try the recipe at a lower temp and see if that works. You’ll need to add on probably 5 minutes to the cooking time.
Good luck!
Matt
I have it and pushed the pot to 500…. and the knob was destroyed and burst in the oven. If you attempt beyond 400, I strongly encourage you to get the replacement knob. I just went to Lowes and got a metal cabinet knob for <$5, and it works perfectly.
Nick
Whoa! Yea… it’s probably a good idea to get a replacement knob.
Billie
Your Loaf looks great!! I make this bread twice a month, it is much loved in my house. Have never done with oats though and the next batch will be just that! Can’t wait to try it.
Virginia
Looks great! I LOVE making bread this way. It always comes out perfect. I make the Olive No-knead for special occasions and walnut/cranberry too. Never fails to impress. Ikea has a great affordable pot that I’ve dedicated to bread making.
MattW
My wife and I have been making no-knead breads for a couple of months now and they are great! I definitely want to try this recipe, with the oats and flax.
The only real problem is trying not to eat the entire loaf in one day!
MattW
A follow up question Nick: Have you tried using a no-knead dough to turn it into a pizza dough/crust? Could it be accomplished by using a large cast iron pan to get a larger flat shape?
Nick
Hey Matt, sorry the delay. I’m not sure that you could use this exact recipe for pizza dough, but there’s definitely a no knead pizza dough recipe. Check out this version from Food52.
Zach
This looks phenomenal. I’m gonna have to try it for sure. I have a cast-iron dutch oven, but it’s enameled — does the enameling process reduce the max temperature that it can withstand? I can’t seem to find any clear consensus on this.
Nick
Hey Zach, shouldn’t be a problem at all. My is also enameled and I’ve probably cooked 50 loafs in it.
thomas
I’ve been using a Lodge Combo Cooker to do this for several years now. The only drawback is that it is much heavier, so be extra careful handling it while hot.
MattW
Zach, we use an enameled dutch oven and bake these at the listed temps and have had no issues. We’ve been baking for 2-3 months have done about 8-10 loaves. No issues yet.
Jerry
Are stone cut oats and steel cut oats the same thing? I always wrap the knob with tin foil.
Gotta try it with oats and flax. Thanks and love your site.
Nick
Stone cut oats aren’t a thing… I meant steel cut. Updated! :)
Sammijoy
Damn, I really want to make this today since I was planning on making some spicy egg salad for tomorrow, but I dont have a dutch oven =( Thats definitely going to be my next kitchen investment!
Nick
Heya, I’ve experimented with other baking methods. The dutch oven is best by far, but you can also bake it on a baking sheet with decent results:
https://www.crunchtimekitchen.com/2009/05/no-knead-bread-revisited-2-ways/
Nicole
We used to make a similar no-knead bread without a dutch oven. I had a regular stock-pot with metal handles that could be headed high enough. For a lid we used a metal bowl. Harder to use but it worked!
thomas
When travelling or making bread for friends using similar methods you can get similar results by putting a metal tray in the bottom of the oven while preheating (or on a rack below the bread) and pouring 1/2c of boiled water onto the hot tray just before closing the oven door. But be very careful, it steams fast and will burn if you aren’t quick.
I’ve done this using a cast-iron skillet for the loaf as well as using a regular baking sheet.
Kansu
This looks great. I will definitely try the dutch oven. We bake our no-knead bread in a buttered (or olive oiled) pyrex dish with a cup of water in the oven for steam. We also experimented with tiny little rolls in small (4 oz?) mason jars and they turned out great and very cute if I say so myself.
Deb G
I love no knead breads and have been baking them for the last couple years. This bread has a wondeful taste but my loaf was really sticky on the inside, which is OK for toast but not for sandwiches. Any suggestions?
Nick
Hey Deb,
This dough is a bit more wet than most. You might need to add on 5-8 minutes to the cook time if it’s still sticky on the inside! Good luck!
Erika
YUM! Yum! This was my first time ever making bread and it was delicious and pretty easy. I used a Le Creuset pot with a hard plastic knob at 500 degrees and it worked just fine. Thank you for boosting my confidence in bread making!
Zoe
Nick, with this recipe, you’ve reduced the sit-out time somewhat dramatically from the traditional NKB. 12-16 rather than 20 hrs and 30 minutes in the towel, rather than 2 hrs. Is it okay to reduce the time for the traditional as well, or is this something specific to this oat recipe? (I currently have some dough sitting on the counter and I’m getting impatient).
Nick
Hey Zoe! I cut back on the rise times both first and second rises. I’ve not seen any difference in my loaves. I think it’s fine to bake the sucker after a second rise of 30-45 minutes. I basically just let mine rise while my oven heats at that point.
Zoe
Thanks, Nick! Got 15 minutes left on the timer. Very excited. Btw, comparing these two posts shows how much your photography has improved over the past four years. (Not that it was bad to begin with.) Plus your old post didn’t mention Betsy. It’s been a good four years. Well done, my friend.
drew
woooooo! i’m happy to say that out of the three loaves i’ve tried to make this was my first true success. I didn’t have irish oats so i substituted with one and a half cups of rolled oats. thanks for the recipe and the excuse to warm up my house with a five hundred degree oven!
Gerry @ Foodness Gracious
I love this bread recipe. I have a few no knead posts from when I first started blogging and they were really good. I actually was making bread this past weekend and halfway through the process I almost started to mutter why oh why didn’t I just use the no knead! lol…
Jackie
Hi Nick…
Cast Iron Dutch Oven is en route, but my company will be here first. Question- bake on a baking sheet or in Pyrex dish? Also, can I use SOME whole wheat flour, maybe 1/4 of total? THANKS so much!
Nick
Hey Jackie, you can definitely add some whole wheat flour. I’ve subbed about 1/3 of the flour with whole wheat with great results. I would do baking sheet… Pyrex can’t stand the heat that you need to get to. Here’s how I did mine on a baking sheet:
https://www.crunchtimekitchen.com/2009/05/no-knead-bread-revisited-2-ways/
Jackie
Thanks. I did the one without oats on a baking sheet (no steam) and it was great. Do I need to do the steam thing with the oat recipe? It kinda freaks me out. Maybe just a metal pan with water in it?
I love your blog. You have really helped me conquer my yeast fears! Thanks a million! My family thanks you for all of the bread :)
Nick
You don’t need to do it by any means. It just more closely simulates the environment that bakers use (high heat/high humidity). A metal pan with boiling water would do the trick also.
Glad you are digging it!
lois
I have been making this bread with 100% freshly milled whole wheat flour and it turns out just beautiful every time
I usually let it sit in rise stage for up to 24 hours as well. Thank you for the recipe!
Kathy
How can I adapt this recipe to my sour dough starter?
Nick
Hey Kathy,
I’m not a 100% on that one… never tried it with a sourdough starter. I found this post on Breadtopia though that might help you out!
http://www.breadtopia.com/sourdough-no-knead-method/
Good luck!
Rob
I make no knead all the time, for about 5 yrs now. I use Lahey or ABin5 methods depending on the bread. I do use a Lodge pre seasoned cast iron oven for this type. I normally make Italian Panelle (Pugliese) which is the basic recipe to this. I grew up eating Italian Bread like the original version. I’ve always had good luck with no knead and want to try this variation. I just just find trying to make breads healthier by adding grains makes it come out denser.
Brian
Can you use quick oats instead of rolled oats?
Nick
Should work fine but not quite the same texture. Good luck!