This is the fourth post in a five-part series called Expecting Nugget! I took the liberty to insanely stock our freezer with lots of good eats in preparation for our first baby. I figured I would share them all because everybody needs good freezer meals! This is an updated post from the archives!
I distinctly remember Hot Pockets accounting for roughly 50% of my nutrition for a few years in high school.
Specifically, I remember running home from class, eating two steak and cheese hot pockets, and then immediately going to soccer practice and running a few miles.
My teenage stomach was tough.
Honestly, I haven’t bought Hot Pockets in a long time but the idea of filling dough with delicious things and freezing it for later is a perfect idea for stocking the fridge.
Mushroom and Swiss Pockets

Ingredients
Filling:
- 1 pound crimini mushrooms
- 1 tablespoon fresh thyme
- 3 scallions, diced
- 2 tablespoons olive oil
- Salt and pepper
- 8 ounces swiss cheese, grated
Dough: (From American Pie)
- 5 cups 22.5 ounces bread flour
- 3 tablespoons honey
- 1 tablespoon kosher salt
- 2 teaspoon instant yeast
- ¼ cup olive oil
- 1 cup milk, room temp
- ¾ cup water, room temp
Instructions
- You can use store-bought pizza dough to make these, but if you want to make your own dough, it isn’t so hard. Start by stirring all ingredients together in a large bowl or the bowl of a stand mixer.
- If you’re using a mixer, fit with dough hook and mix on low for 4-5 minutes, then let dough rest for 5 minutes, then mix again on medium-low for another 2-3 minutes. If you’re mixing by hand, stir the dough with a large spoon until the ingredients come together then dip your hand in water and vigorously work the dough until it forms a soft ball of dough that’s slightly sticky and soft.
- In either case, if the dough is very sticky, mix in a bit more flour by the tablespoon. If it’s very dry, then mix in more water by the tablespoon.
- Once dough is formed, coat a large bowl with oil and roll the dough around to cover it with oil. Cover the bowl and let rise for 2 hours. Punch down the dough and then let it rise again for an hour. Proceed with the recipe.
- TO make the filling, wash and slice mushrooms. In a large skillet, add olive oil over medium heat. Once hot, add mushrooms and cook until they start to lose their liquid, about 5 minutes. Then add scallions, thyme, and a pinch of salt and pepper. Continue to cook for another few minutes until mushrooms are soft and water is evaporated from pan. Set aside to cool.
- To make a hot pocket, weigh out 4-4.5 ounces of dough and roll it into a large six to eight inch circle. Flour the surface lightly so the dough doesn’t stick to your counter.
- Add a large spoonful of filling to one side of the dough and top with about an ounce (or more) of grated cheese.
- Fold dough over and press out any air, then press the outer edge to seal the hot pocket. Crimp around the edges.
- When you’re done with all the hot pockets, add them to baking sheets lined with parchment paper.
- Cut a few slits in the top of each pocket so steam can escape and bake the hot pockets at 350 degrees for 20-25 minutes.
- The pockets are done when they are golden brown on the outside.
- Either serve them immediately or let them cool completely, wrap them in foil, and store them in freezer-safe plastic bags.
- To reheat frozen hot pocket, cook in microwave on high for 2-3 minutes.
Nutrition
Did you make this recipe?
Making the Dough
You could easily use store-bought pizza dough for this recipe and make it even easier, but if you want to make your own, this dough recipe is perfect for calzones or any sort of filled item.
It’s just the Americana pizza dough recipe from American Pie which ends up being a bit doughier than the thinner Neapolitan recipe that I use for my actual pizza dough.
The nice thing about this dough is that you can easily make it in a stand mixer or without one.
Start by adding all the ingredients to a large bowl (or the bowl of the stand mixer) and mix the ingredients together until they form a course ball of dough. Then either mix on low with a dough hook for 4-5 minutes or dip your hand in water and vigorously work the dough with your hand until it forms a smooth ball of dough.
Let the dough sit for five minutes to relax and then continue to mix it (either with dough hook or by hand) for another few minutes.
Eventually you should have a really smooth ball of dough.
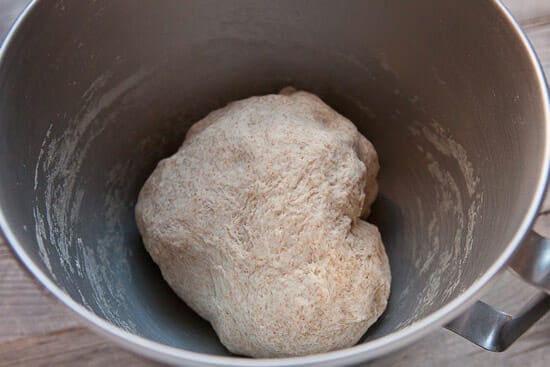
Once your dough is formed, add it to a lightly oiled bowl and cover it to let it rise for two hours. Then punch the dough down and let it rise for another hour.
Making the Filling
Mushrooms and swiss cheese is one of my favorite fillings for calzones or any type of filled dough thing.
I recommend crimini mushrooms because they have a lot of flavor and hold their texture well, but you could use normal button mushrooms if you wanted.
Besides mushrooms, I recommend chopping up a few scallions for the filling and also using from fresh thyme which is a perfect herb with mushrooms.
To make the filling, just add a few tablespoons of oil to a large skillet over medium heat. Then add the sliced mushrooms. Let them cook for a few minutes until they start to lose their moisture.
Then add in the scallions, thyme, and a good pinch of salt. Let the mixture continue to cook until most of the liquid has evaporated.
Try not to overcook it though or the mushrooms will get soggy. This was my finished filling!

Making the Pockets
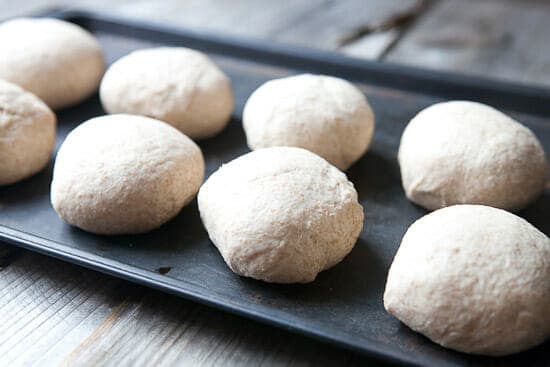
To make a good pocket, you’ll need at least four ounces of dough. I wouldn’t go larger than four and a half ounces or it’ll be too big. A kitchen scale helps to make sure your pockets are all the same size.
If you do decide to just eyeball it, then divide your eight dough balls before making any of the pockets so you can adjust the size if you run out of dough.
On a lightly floured surface, roll your dough ball out into a rough circle.
As you can see below, I’m pretty bad at rolling things into circles.
Once the dough is rolled out into about a 6-8 inch circle, add about 1/4 cup of filling to one side of the dough.
Top the filling with a big handful of cheese. I guessed this was about an ounce, but honestly, I didn’t weigh it so you might want a bit more.
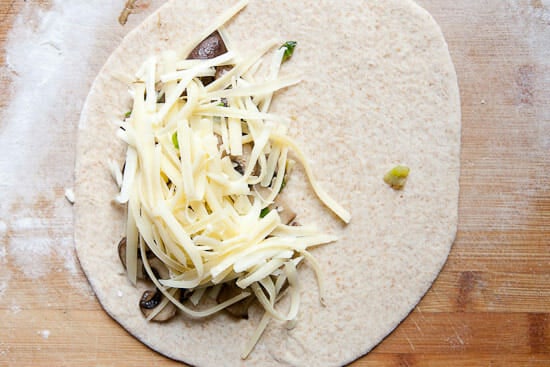
Then go ahead and fold the dough over to form the pocket! Press down on the dough to press out any air and then seal the dough around the edges.
If you’re dough is really dry, you might need a bit of water around the edges to seal it well. Then just crimp the edges to make it pretty.
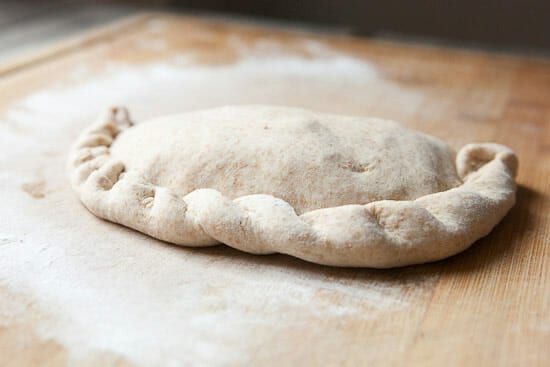
I’m far from an expert with these guys so mine all kind of turned out to be slightly different shapes and sizes. It really doesn’t matter though. Don’t stress about it.
Once all your pockets are formed, add them to a baking sheet lined with parchment paper and slice a few slits in each pocket so steam can escape.
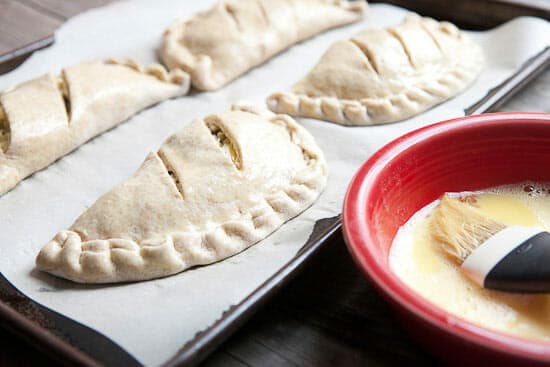
Bake these guys at 350 degrees for about 20-25 minutes until they are golden brown.

You can, of course, eat these right away. But you’ll probably want to freeze a few also.
Freezing the Pockets
These guys are easy to freeze. Once they have have cooled to room temperature, wrap each pocket tightly in foil and then store them in a freezer-safe bag!
Definitely be sure to label these as well since they are kind of an ambiguous shape.
Thawing the Pockets
Any time you want one of these bad boys, pop it out of the foil and toss it in your microwave on high for about two and a half minutes.
Doesn’t get easier than that!



Abi
These look awesome! Thanks! And I’m extra excited about the dough recipe – I see lots of pockets in my near future.
Frugal Portland
Oh man this makes me think of Jim Gaffigan. Caliente pocket! http://www.youtube.com/watch?v=N-i9GXbptog
Katie
These look great! I make something similar, but I wrap it in phyllo. Really, if I wrap any semi-healthy foods in phyllo my boyfriend will eat it. Great way to get some veggies in his belly! I do mushroom/swiss/red pepper. And suddenly, I know what I’m making for dinner!
Mariana
I LOVE THESE!
But really, I love anything that’s stuffed with mushrooms.
Also, we have the same plates and every time I see them I giggle.
Megan
I don’t have a microwave – anyone have some tips as to how these can be reheated in the oven?
Nick
Hey Megan, they reheat great in the oven. You can just leave them in the foil and pop them in for about 20-25 minutes at 350-375. Then check them. They might need a few more minutes but should do the trick!
Carol Baumann
Great Idea Nick!! And to think of stocking the freezer for your busy happy time with homemade instead of trying to run out for some kind of take out, Priceless!!
Billie
These sound like an awesome take to lunch item!! Going to pack the freezer!
lilly
love your recipes and this idea is great to freeze and enjoy later. one tip I use is wrapping on a paper towel first, then the foil paper. when you want to eat it, take out the foil and microwave with paper towel on. it keeps them moist and won’t crack or dry out. after heat up, unwrap paper towel and wrap back on same foil and you have lunch on the go! I do this with frozen breakfast burritos too! enjoy, I sure do.
Andy
Yum–played hooky from work and made these for lunch. I only got 7 (plus 4 breadsticks) because I apparently overfilled them, and only 2 of them looked remotely decent (un-blobby), but they tasted great. I think I might like them better with thinner dough, though (your pizza dough, which I love). Do you think this dough freezes better?
Nick
I think both freeze about the same Andy so you could use the other dough recipe if you wanted! Glad they turned out okay for ya!