When I used to bartend, I worked for a long time in the same restaurant and got to know the cooks pretty solidly. It was a Southern style restaurant with really good comfort food – fried chicken, shrimp and grits, etc. As I got more comfortable with the place, I would occasionally ask questions about the mystical goings-ons in the kitchen.
One thing I never got around to asking about, but always noticed, was the huge vat of clarified butter that they kept near the stove. It had to be at least a gallon, if not more. Step one in probably 80% of the dishes at the restaurant would be to spoon some of the liquid into a hot pan.
I never really understood why it was important. All I knew was that it made great pancakes!
You see… the solid stuff looks like this:
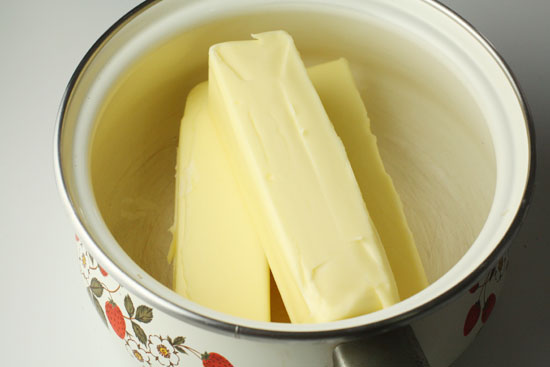
Before we actually make clarified butter, it’s worth taking a few sentences to go over what exactly is going on in the delicious yellow sticks above.
What’s With Butter?
In it’s most basic form it’s three things: Fat, Water, Proteins. It’s nothing more than an emulsion between these. Based on the quality and brand, the percentages of each varies quite a bit, but most butter is about 75%-80% fat.
The problem is that those proteins (milk solids) burn at about 250 degrees. This is why butter smokes way faster than olive oil or vegetable oil. It’s got stuff in it!
This emulsion makes it really great for baking, but not always great for frying and cooking because the stuff just can’t take the heat. That is, of course, unless we could find a way to remove those solids and most of the water from the equation. Then we’d be left with pure delicious butter fat.
And that’s exactly what you do when you clarify butter. So let’s make it happen!
What you’ll need.
You’ll need the following to make this happen: Unsalted Butter. (Salted butter will burn even faster and is no good.) You can do this with as little or as much butter as you want. For the home cook, about a pound is probably good.
You’ll also want a sauce pan, a very clean bowl, a mesh strainer, and some coffee filters.
The First Foaming
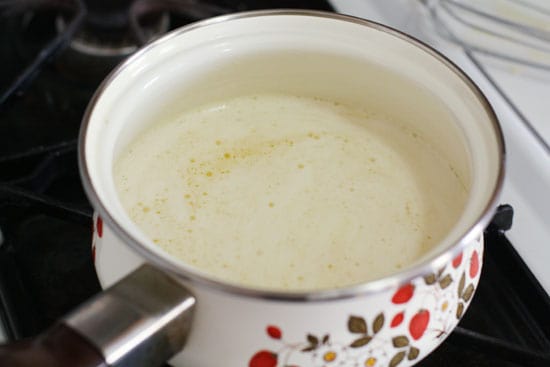
There’s a lot of online stuff for clarified butter and all of it was a bit confusing. I went with Alton Brown’s technique and it worked pretty well. Hopefully, this will make sense to everyone. The first step is to heat your butter in a pot over medium heat until it starts to slightly boil. After one or two minutes it’ll begin to foam.
It’ll look like this:
The Next Phase
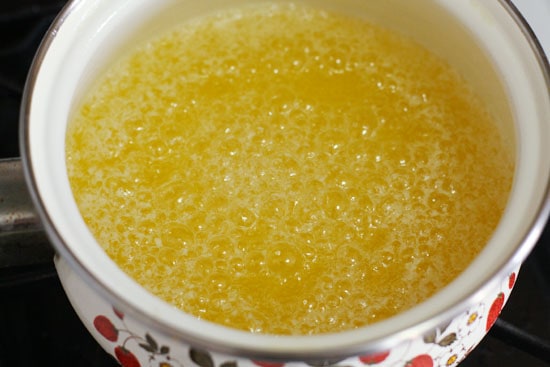
Now turn your heat down to low and start stirring your butter slowly but consistently. Almost immediately, the foam will fall apart and your butter will start to gently bubble (that’s the water!). Next, you want to wait about 8 minutes (but keep stirring) until your butter begins to foam again.
Eventually you’ll start to notice small white particles floating on the surface (the solids) and they’ll start to form a skin as more water evaporates and the bubbles get smaller and smaller.
This was about 30 seconds before that step:
Done!
Once you see that second foaming, you’ll all done. Keep in mind that your stirring every 30 seconds or so throughout this time or else your solids will just sink to the bottom and burn immediately.
Anyway, once that second foam starts forming kill the heat and let your butter cool slightly – just a minute or two.
Then very slowly pour the butter through your straining set-up which should be: A bowl under a strainer with a coffee filter in it. It’s important to pour slowly because a lot of your solids will fall to the bottom of your pan and you want to keep them there.
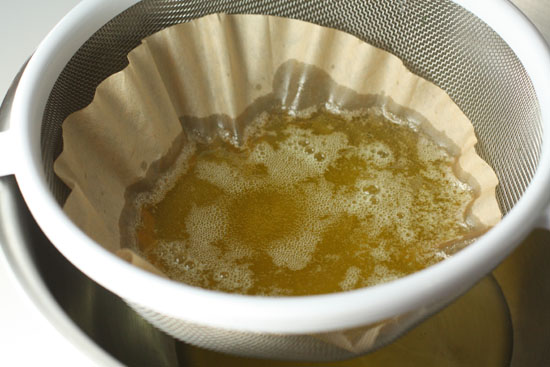
The straining will go pretty slowly and I even decided to replace my coffee filter once (pour butter back into pan, replace filter, slowly re-pour butter). Eventually though all of it should strain through and you should be left with some tan/white muck at the bottom of your pan.
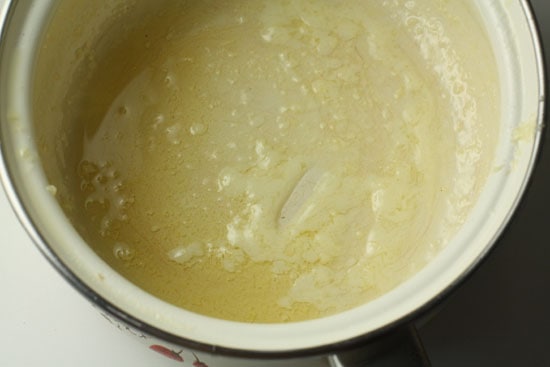
That’s the solids in the butter! It’s actually not too bad to eat. Kind of tangy. I just threw mine out though.
This was what I was really going for: the clarified stuff!
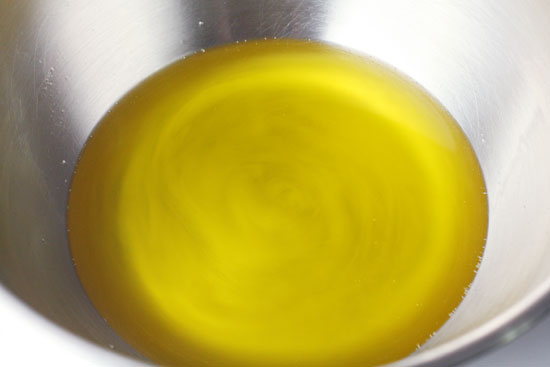
Ideally, if you do it 100% correctly, you don’t need to refrigerate this stuff. It’s all fat and it would keep at room temperature for awhile just like any other oil. The problem is that you probably won’t get it perfect. I’m sure I didn’t. So to be safe, just store it in your fridge. If you leave at room temperature and let it cool, it’ll eventually start to re-solidify, but it won’t become quite as solid as it was before.
It’ll be soft and very spreadable. Like this:
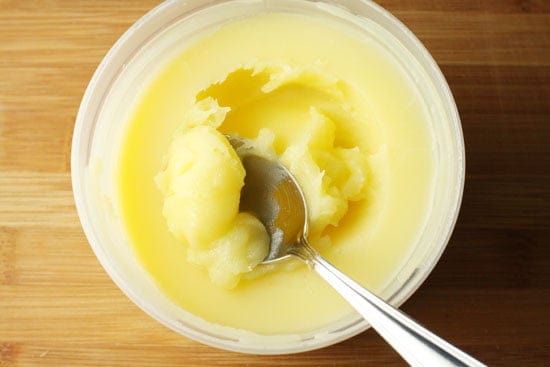
If you put it in the fridge, it’ll become pretty solid, but turn into crystal clear, golden butter very quickly in a hot pan or even a few seconds in a microwave. The good news is that this stuff will keep for months in the fridge, so once you make it, you can use it for all kinds of stuff.
My first experiment with it? Grilled cheese of course! It created a perfectly browned crust and didn’t burn quite as quickly as normal butter would.

Other uses for it are endless. Pancakes? Omelets? Seafood? What can’t you put clarified butter on?
I wouldn’t being doing my job as a food blogger if I didn’t note that there are a ton of listed methods for making clarified butter. This is just the way that worked for me. Some other methods include:
Traditional Method: Similar to what I did except more skimming and watching. Probably results in a slightly cleaner final product, but my method worked just fine I think.
The Careful Pour Method: Theoretically, if you let the butter cool for a few minutes, you could pour very carefully and pour off most of the clarified butter and leave the milk solids at the bottom of the pan. This probably won’t produce perfect clarified butter, but it’d be a lot faster and the results would probably be usable for the home cook.
The Bag Method: This method lets gravity do the work, but I was just worried that gravity would work too fast and I’d lose a lot of precious butter. Also, it has as elaborate of a setup as the strain method.
At the end of the day, I was very happy with my clarified butter though and I think you can expect to see more of it on Macheesmo – including tomorrow!

Jason Sandeman
Great job Nick! Two things:
1) NEVER leave the butter unattended. If you must leave the area, take it off the heat. Trust me, I have put out my share of kitchen fires from cooks over this.
2) You can try leaving your butter overnight in the oven with just the pilot on. When you get there in the morning, it will have clarified for you. (Oven could be at 180 F if you are wondering.) That is how we get huge vats of clarified butter.
You can also use a ladle to take out the clarified butter. Tilt the pot, and then you will have less butter solids.
Also the butter solids can be used to fortify a soup, if you like. :)
Nick
Thanks for the comment Jason! The oven thing is a great idea. Didn't even think about that.
And yes… don't leave it unattended. Good warnings.
Kelly
Can clarified butter be used in baking?
Nick
I think I would leave clarified butter for frying/sauteing things. It would be kind of like baking with olive oil. You could do it sure but the results may not be great.
Dan
GHEEEEEEEEEEE!!! You forgot to mention that if you are making Indian food and it asks for "Ghee", it is just clarified butter. I am just commenting cause I like to say/type the word GHEEEEEEEEE
Nick
Nice call man. Definitely the same thing as GHEEEEEE!
CGCouture
So do you have any sort of nutritional facts for the clarified butter? How much would this wreck my diet in comparison to EVOO or Canola oil or whatever? I'm not a margerine user, and have recently quit using nonstick cooking spray, so am excited about finding a potential replacement for those.
Nick
Butter has slightly less fat than olive oil, but way more saturated fat. The clarifying process doesn't really change that composition so I guess olive oil is still healthier, but you can't make olive oil pancakes (or can you?) so clarified butter has it's place.
I try to avoid the spray stuff also ;)
There's a nutritional chart comparing different cooking fats on the Wikipedia page for Butter.
Lindsey S
thank you for this post!!!
Also, thank you to Dan for saying it's the same a ghee, cause I didn't know what that was and I'm going to make Chiot's Run's curried lentil soup and it asks for it! :)
Cookin' Canuck
What a fantastic tutorial on clarifying butter! You made the whole process seem rather manageable. Whenever I see an Indian recipe that calls for ghee (clarified butter), I always end up using oil. Now I'm going to use the real stuff.
Rex
Excellent post Nick.
dawn
I have always heard that clarified butter and ghee are not technically the same thing. Ghee is cooked much longer, which creates a more nutty flavor.
Here is a short video on How to make Clarified Butter and here is one for What is Ghee.
Sure do wish I had that grilled cheese sandwich right now…I guess I know what I am going to have for dinner :-)
rob
If you have a few hours to spend and want a dead simple approach try this method:
Melt butter as specified but once the butter is entirely broken (oil and water) transfer to a jar or other vessel that is taller than it is wide.
Put in the fridge for 2+ hours.
use your knife honer to puncture the oil that has hardened on top and drain the milk solids that are on the bottom.
boom done.
rob
oops i forgot to say to scoop off the foam in the first step.
Jessica
Two more great uses for clarified butter:
1-Make hollandaise! Hollandaise should always be made with clarified butter, not just regular melted butter, as many home cooks do.
2-Clarified butter is excellent for making the dark roux you need for traditional gumbo. It is, of course, less likely to burn than regular butter, but you still have all the delicious flavor of butter.
Nice post!
Angela@spinachtiger
I have always wondered about clarified butter. Great post. I will refer back to this.
Authentic Chicken Tikka Masala with Homemade Naan ~ Macheesmo
[…] oil though if you want (a shortcut!). If you need help making clarified butter, you can check out Clarified Butter Tutorial on it. I didn’t even strain it for this recipe. I just melted down some butter over low heat […]