Betsy and I used to be big time sandwich people for lunch. In my opinion, you can put almost anything on a sandwich and it’ll probably be decent as long as one thing is really good: The bread.
If I get a sandwich and it’s made with some crappy flimsy bread, I just don’t care for it. I want my bread sturdy and ready for tons of condiments and toppings. I want to be able to wrap it up and eat it a few hours later without worrying about it falling apart.
We’re getting back into sandwiches these days after a brief stint in a quinoa salad.
So I took this as an opportunity to work on my sandwich breads.
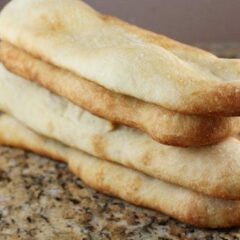
These big, thin, sturdy loaves called stecca or “stick” turned out to make for some of the best sandwich bread I’ve had!
Stecca Sandwich Bread
Ingredients
- 3 Cups 400 grams bread flour
- 1 Teaspoon kosher salt
- 1 Teaspoon sugar
- ¼ Teaspoon yeast, instant or active dry is fine
- 1 ½ Cups cool water, 55-65 degrees F.
- Additional flour, olive oil, and kosher salt for dusting
Instructions
- Combine flour, sugar, salt, and yeast in a large bowl. Stir in water until combined. It should be a pretty wet dough.
- Let sit, covered, for 12-18 hours.
- Scrape dough onto a well-floured surface. Work the dough a bit by folding it over itself. After a few folds, form a loose ball with the dough.
- Add the dough to a well-floured towel, seam side down. Drizzle dough with olive oil and top with a pinch of kosher salt.
- Cover dough ball and let rise for 2 hours.
- Cut dough into 4 equal parts. Lightly oil two 18 inch sheet pans.
- Form 4 long, thin loaves with each quarter of dough. The loaves should be a few inches across and fairly thin. Don’t worry about them being all the same though.
- Drizzle each loaf with a bit more olive oil and another small pinch of salt. Let them rise again for 30 minutes.
- Bake in a pre-heated 500 degree oven for 15-25 minutes until the loaves are golden brown. Mine took about 20 minutes.
- Let cool for at least 30 minutes before eating.
- To store, let cool completely, then wrap in plastic wrap and store in the fridge.
Notes
Nutrition
Did you make this recipe?
The Dough
This dough comes together just like the normal loaf of no knead bread would. It takes maybe 60 seconds to get it ready, but it does need to sit for 12-18 hours before you can continue with the recipe. So a bit of planning is necessary unfortunately.
Don’t worry though, you’ll be well-rewarded for your planning efforts.
Start by mixing the flour, sugar, salt, and yeast in a large bowl. Add in the water and stir to combine. The dough should be very loose. It should be too wet to knead even if you wanted to.
This is what mine looked like after about 15 seconds of stirring.
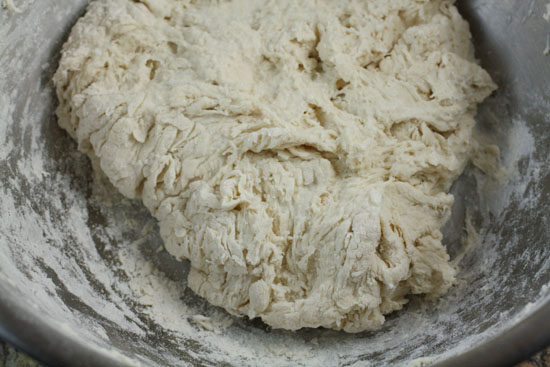
Cover this with plastic wrap and let it sit for at least 12 hours.
During that time, the slow fermentation will basically knead the dough for you as the gases work through the dough.
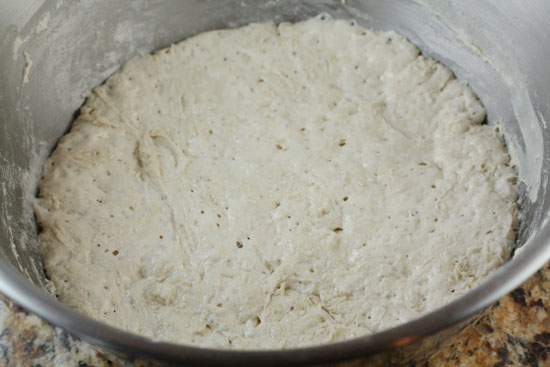
You’ll come back to a dough that’s more than double in volume and very soft. It’ll be really wet, more wet than when you left it because the flour is now completely relaxed.
These are all good things.
Shaping the Loaves
So now that you have this big bowl of dough, let’s make some great sandwich bread.
The thing to remember when working with this dough is that you’ll need to use a good amount of flour to make sure you can work with it. Otherwise, it’ll be too sticky.
So sprinkle a good amount of flour on a work surface. Then scrape out the dough from the bowl and turn it over itself a few times. Kind of press it down, then fold over the edges. Just do this a few times until you have a rough ball of dough that holds its shape. It shouldn’t take more than a minute.
Transfer this dough ball to a kitchen towel that’s been floured also. Once the dough is on the towel with the seam side down, drizzle it with olive oil and sprinkle it with a pinch of kosher salt.
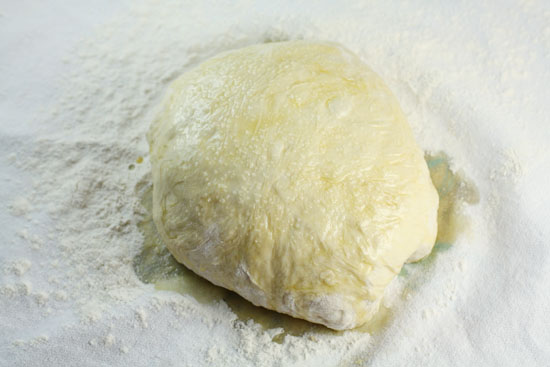
Cover this with the towel and let it rise again for 2 hours.
When this rise is done, take the dough and cut it into four even pieces. If you want to get exact, you could weigh them, but I kind of just went by sight.
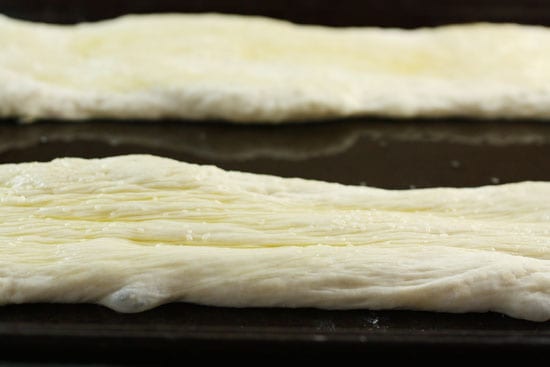
Lightly oil two 18 inch baking sheets. Take each quarter of dough and stretch or roll it out to fit the length of the pan. So each piece of dough will stretch to 18 inches and should be a few inches across. It’s fine if they are very thin at this point.
Also, don’t worry about the loaves being perfectly uniform. Go for the rustic look.
Once the loaves are shaped, drizzle them with a bit more olive oil and salt and let them rise again for 30 minutes.
Baking and Sandwich Making
Bake these guys in a preheated in a 500 degree oven for 15-25 minutes. You might need to rotate the pans if they are looking like they are cooking unevenly.
Mine took about 20 minutes before they were golden brown on the top.
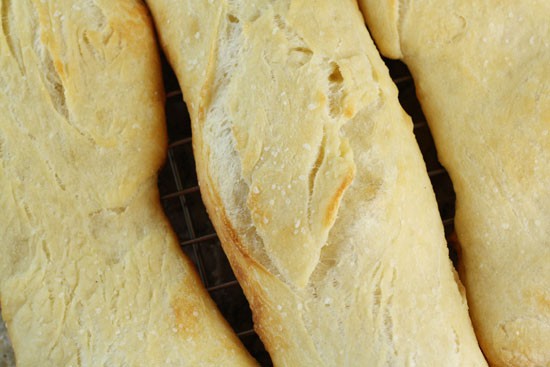
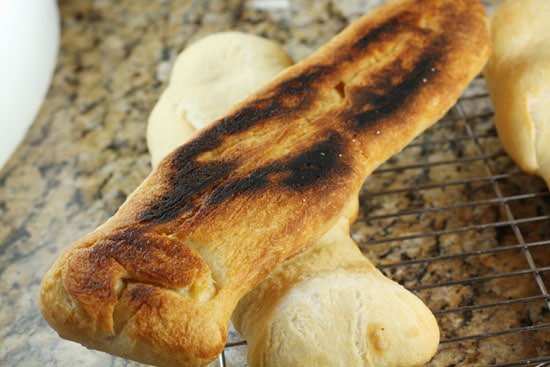
I was worried that mine were getting burned on the bottom, but it turned out to be perfect.
This was what the bottoms looked like after 20 minutes.
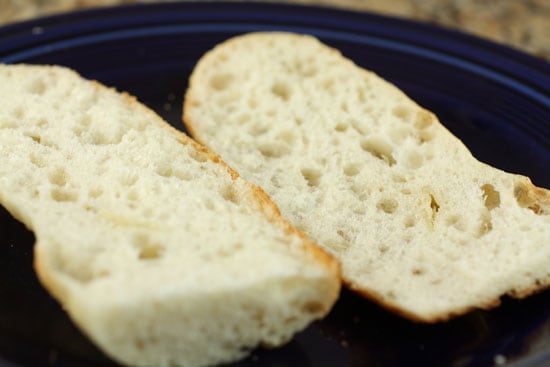
After you let these cool for at least 30 minutes, you can chop into them.
Mine had a beautiful crumb structure. Perfect for sandwiches!
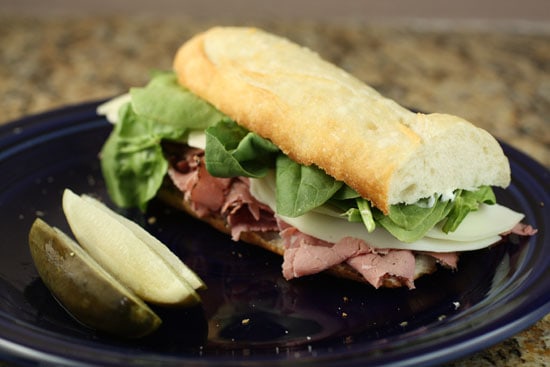
Betsy likes turkey, but I was on a pastrami kick last week.
One loaf of the bread makes two really big sandwiches actually.
As you can see, this is one mean sandwich. I’d guess this would cost $10 at a deli and I made it for around $3-$4.
If you’re not a sandwich person, this bread would be great for just dipping in some olive oil as well. It’s a pretty good all-purpose loaf that is a heck of a lot easier to make then, say, a traditional French baguette.
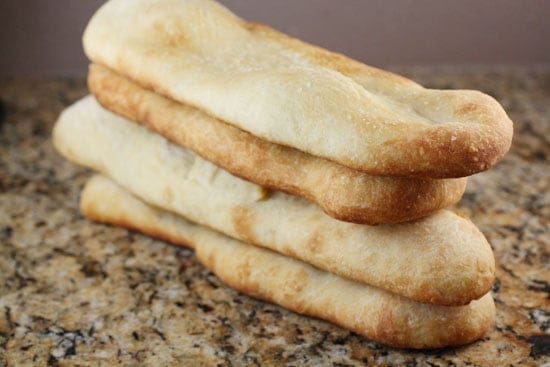
Once my loaves were cooled completely, I stored mine in the fridge, wrapping them twice in plastic wrap. They kept really well for the whole week!

Tania
yummy!!! definitely trying this!
My recent post Strawberries and roses
Meister@NervousCook
Again with the you and the reading my mind: I actually just this very minute pulled out two loaves of sandwich bread, baked this morning specifically for this afternoon's lunch!
Bread baking has been a total game-changer for me; I can't imagine buying grocery story filler-ingredient-packed crap ever again. (Get that HFCS outta my bread, son!) Looks like you bake up a pretty nice loaf yerself there.
My recent post Perfecting the hard-boiled egg
Nick
Thank ya!
Tom
This looks really good. I've been making the Cook's Illustrated no-knead, so I know how easy the dough is. Did you put both pans in the oven at once and then switch from top to bottom in the middle? Or one pan at a time?
Kathy – Panini Happy
This bread looks fabulous – I'll definitely give it a try!
My recent post Prosciutto- Pesto & Fresh Mozzarella Panini
CGCouture
Oooh! Be still my little bread-a-tarian heart! These look fabulous and delicious, Nick! I really need to make up a couple of batches of these, since we eat a fair number of sandwiches too. :-)
My recent post Which is faster
thefunkykitchen
Gorgeous! I've got a couple of awesome sandwich ideas floating around in the ether, perhaps it's time to bake some stecca bread.
Claire
Those look great, Nick! We made that same recipe last summer and topped the stecca with soft goat cheese, pickled red onions and beets, and some arugula! It was fantastic, something about the stecca bread made me feel like I was dining at a fancy cafe, even as I ate my lunch at my desk at work!
Nick
Well, with bread like that you pretty much are eating in a fancy cafe!
Zoe
Lovely! I can't get this one out of a vending machine!
Nick
That'd be one awesome vending machine!
Brendan
i've had dreams about that vending machine
Mireya
Hi Nick,
I've tried several versions of Lahey's no-knead bread and it's some of the best bread I've ever tasted! I'm anxious to try the stecca for those deli style sandwiches. I was wondering if you used plain white bread flour or unbleached?
My recent post Miso Soup with Vegetables and Tofu
Tori
Can these be frozen? And when would you freeze them (as dough/cooked/etc)?
Nick
If you're going to freeze them, I'd cook them first, then cool them completely, then freeze them. Then you can reheat in the oven for a few minutes.
They keep well in the fridge for a week though so if you eat them in a reasonable time, you shouldn't need to freeze them.
Rob
I made these a few weeks ago, as I’m big on the regular no knead bread (pugliese). These came out better than expected, only next time I would go for 3 instead of 4. Four of them came out to thin for me. Thanks for sharing, I have Jim’s book!!! Enjoy your website and liked you on FB.
Rob
A reply to another post, I made mine last month and ate 2 of them and froze 2. They freeze well and I just had 1/2 tonight and it was fine.
Jack
Very nice site with excellent information. On your recommendation I just purchase Jim Lehey’s book. Been baking no-kneed breads for some time and baking for well over 20 years, mostly when living overseas. I have several bread books including a few from Peter Reinhart’s, highly recommended for all levels of home bakers. I will continue to visit your site and look forward to seeing recipe recommendations. Great pictures on the recipes.
Keep up the great work!
All the best,
Jack
Nick
Thanks for the comment Jack!
Cheers, Nick
Madi
I have made this twice in the last week and it has been brilliant. I just turned mine into a hot chicken roll and it was so tasty!
Thanks for the recipe :)
Nick
Hey Madi! So glad you found and liked the recipe. It’s really a hidden gem on macheesmo I think. I just love the sandwich bread this recipe makes. Thanks for the comment!